Abby, Rachel, Juan, Jacob
Solar water heater lab |
Our solar water heater lab was designed to find an alternative way to get power for our tiny home. We made a lab that would test how efficent our design was.
|
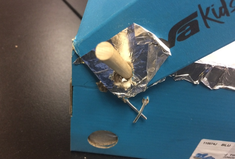
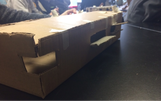
This is an image of one of the features on our water heater it shows how we can move the top depending on the angles of light for the different seasons.
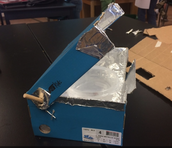
This is the solar heater we created from the side view
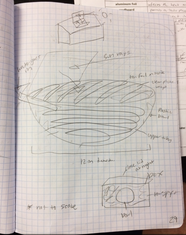
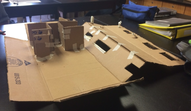
In this picture you can see our first degin from top view with box and copper tubes, and view of just the bowl.
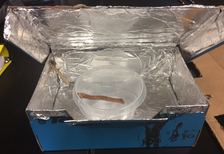
This is the view of our entire design you can see we decided to fill the water in the plastic bowl. We also had the copper inside the bowl to further heat the bowl. We lined the entire box with aluminim foil to have light reflect into the box.
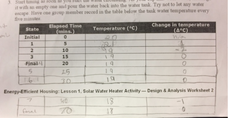
When testing how our design worked we would cheack with a thermometer every 5 minutes for 70 minutes. We had unconclusive results for multiple reasons. The tempature out side was cold and changing so that would explain why it didn't go up. Also we didn't include insulation becuase we thought it would be gaining heat not loosing it so there wouldn't be a reason to however that wasn't the case.
Lighting experiment |
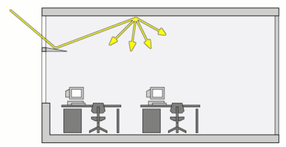
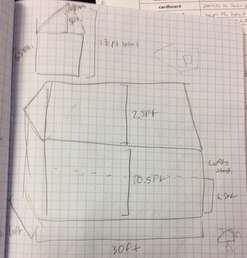
Our lighting experement was an experiment used to test different day lighting tecnices. For this project we built a cardboard model of a 1000 square foot house with many day lighting tecnices.
|
This is an image of our house opened up. We made it able tp open so that you could see how much light is getting let in. As you can see there are many windows. We used skylights, normal windows, light shelves, solar tubes and clerestory windows.
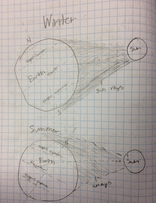
In order to know where the windows should face we had to study light. Here is an image of us charting the path of light in diffrent seasons.
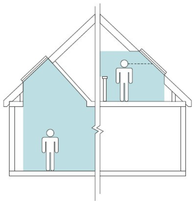
Here is a side view of our house. You can see one of our day lighting tecnices we used, a light shelve. Also we added a corner window Which proved to work the best. Becaue it let in light for a larger portion of the day.
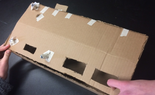
In this picture you can see another one of our daylighting tecnices however this one as less succsessfull. If you look at the picture you can see little silver rod like things comming out of our roof. Thees are light tubes however due to construction error we found them completly useless.
DAY LIGHTING TECHNIQUES |
Here is the daylighting techniques we used
|
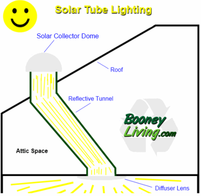
A solar tube is a tube that transfers light from your roof to your house. The light goes into a round solar dome on the top of you house. Then gets reflects it down through a tube into diffuser lens which dispurses the light in a room.
|
Solar tubes |
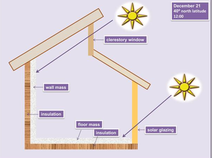
A clerestory window is a normal window raised to the top side of a building so light comes from the roof more than a wall. In order to be a clerestory windows it has to be vertical and have a part of wall above and below the window.
|
Clerestory Windows |
Sky lights are any window on the roof with the same section of the roof touching it not connected by two walls.
|
Skylights |
Light sheleves are made of a reflective material at the bottom of a winow or in the middle of a window that reflect the light up onto the ceeling of the room which then is reflected down onto the entire room.
|
Light Shelves |
Wind Turbine Project |
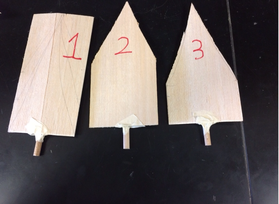
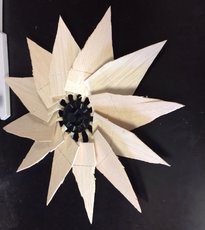
Our Wind Turbine project was to test different fan arms to see what type would spin the fastest to create the most power. This was another way found for an alternative energy source in our tiny house.
|
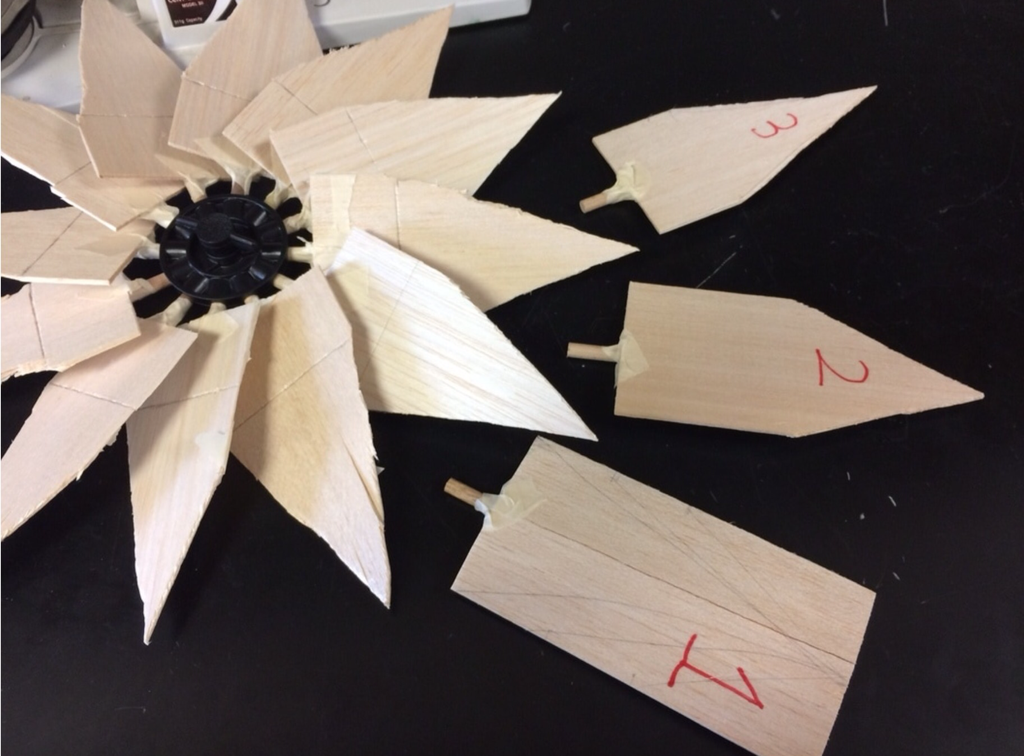
In the first picture you can see three different cuts of wood we used. For our first test we had normal square pieces of thin wood. Then we would cut from center middle to center out side for the second. And the third was from center top to 3/4 way down on the side. We placed these pieces of wood on a wheel which held 12 blades. After testing each one with three diffrant speeds of wind we found out that blade two worked the best. We believe it worked better than blade one because it had less drag. However we weren't exactly sure why it worked better than blade three because blade three has less drag then blade two. Our thoughts were that perhaps since the blades are all so closely together the bottom is somewhat one large circle and so tips of the blades werent large Enoch to push around fast enough.
|
|
|
Tiny House |
For our Tiny House we had to use our Day lighting tecnighes and design a full tiny home. We made blue prints, 3d models and even a full budget list
|
Blue prints
|
|

|
|
Side of house
|
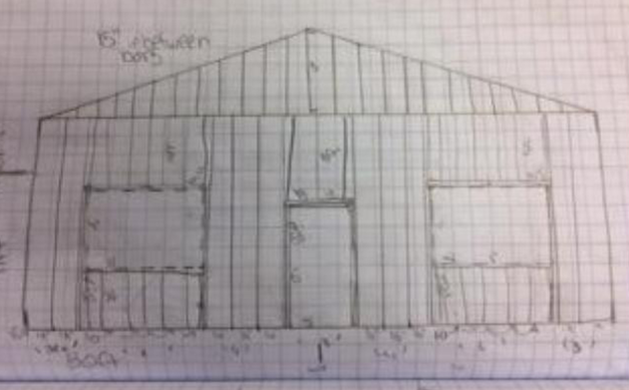
Front of house
|
Back of house
|
3D Model
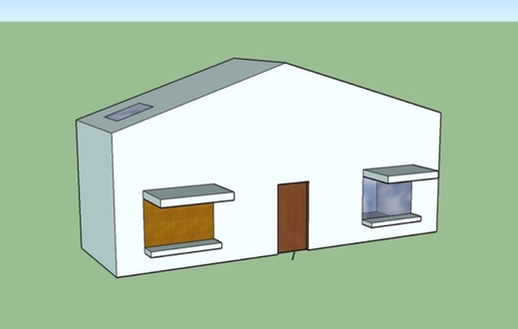
Front view
|
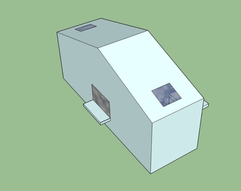
Back above view
|
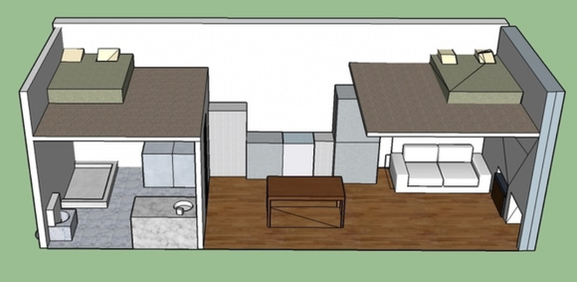
Front inside view
|
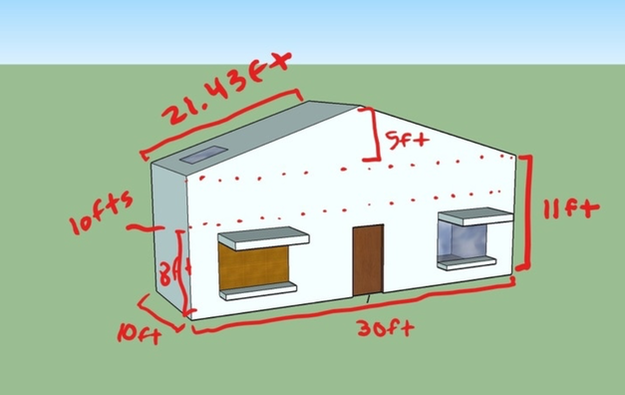
Front measurement view
|
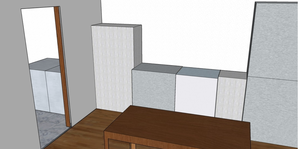
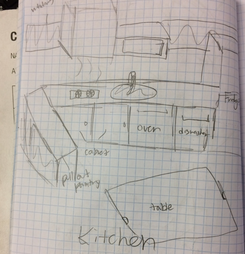
Inside kitchen view
|
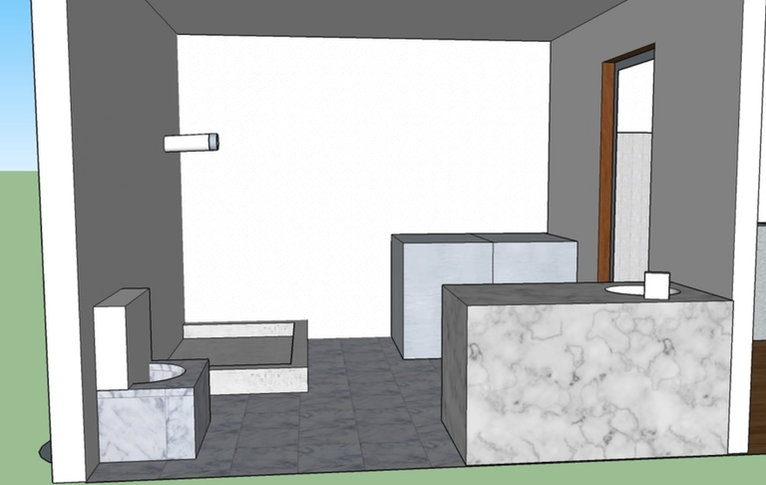
Inside bathroom
|
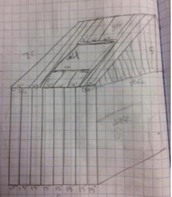
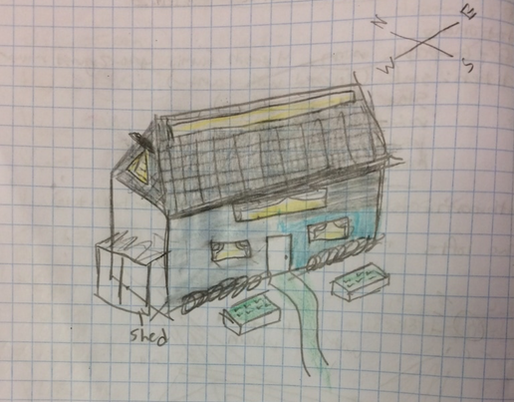
Origanal sketch
|
|
|
|
Front view
|
Kitchen view
|
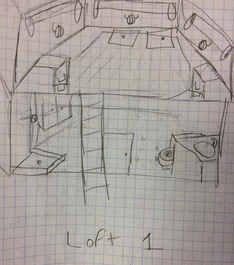
Loft #1
|
|
|
|
|
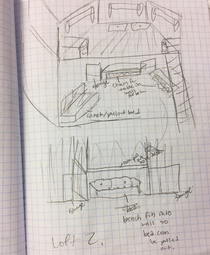
Loft #2
|
Outside dimensions
|
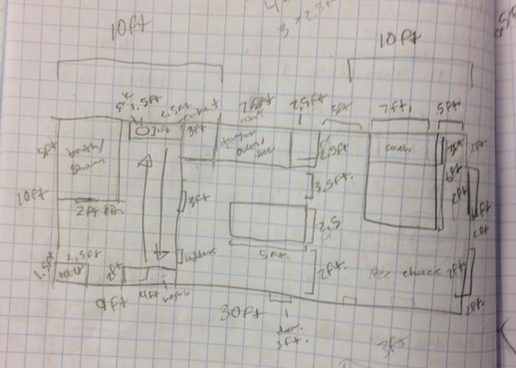
Bottom level floor plan
|
Reflection
For this project I felt our group worked really well together. We were done first and finished everything with time to spare. I feel I personally got better with my work ethic I was on task for over 90% of the project and only on a few occasions was I off task. I think I did get off task because of how long the project was and it was hard to stay focused and engaged for the whole time. A high point of our project was when we finished our 3d model. This was a high point because we worked long and hard on it and had to restart once. Another high point was when we finished our entire project. This was a high point because we finished so timely and got plenty of time to practice our project. A low point for our project was when I didn't realize what the blue prints entailed. So those where not done completely. Overall I felt really happy with this project and how our group worked together.
